No-Bake Rainbow Cheesecake Bars
Highlighted under: Comfort Kitchen
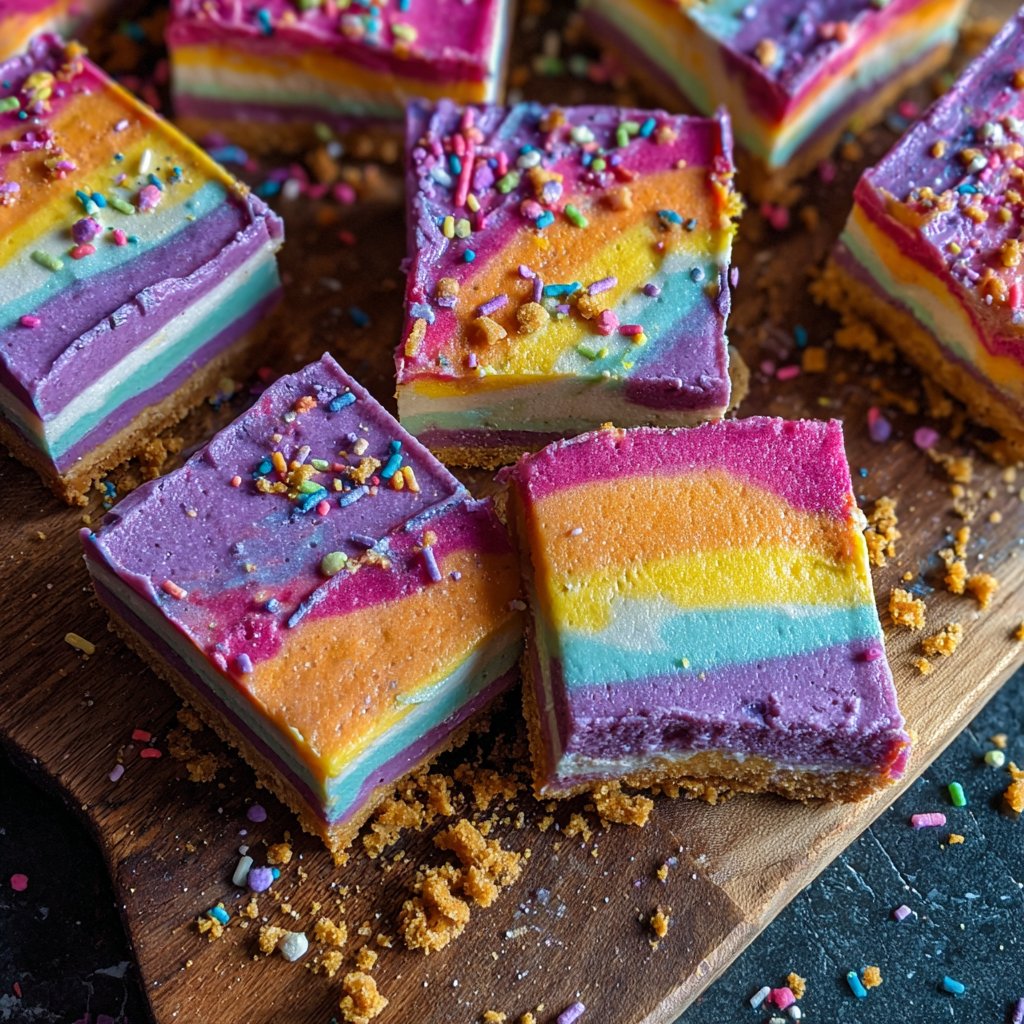
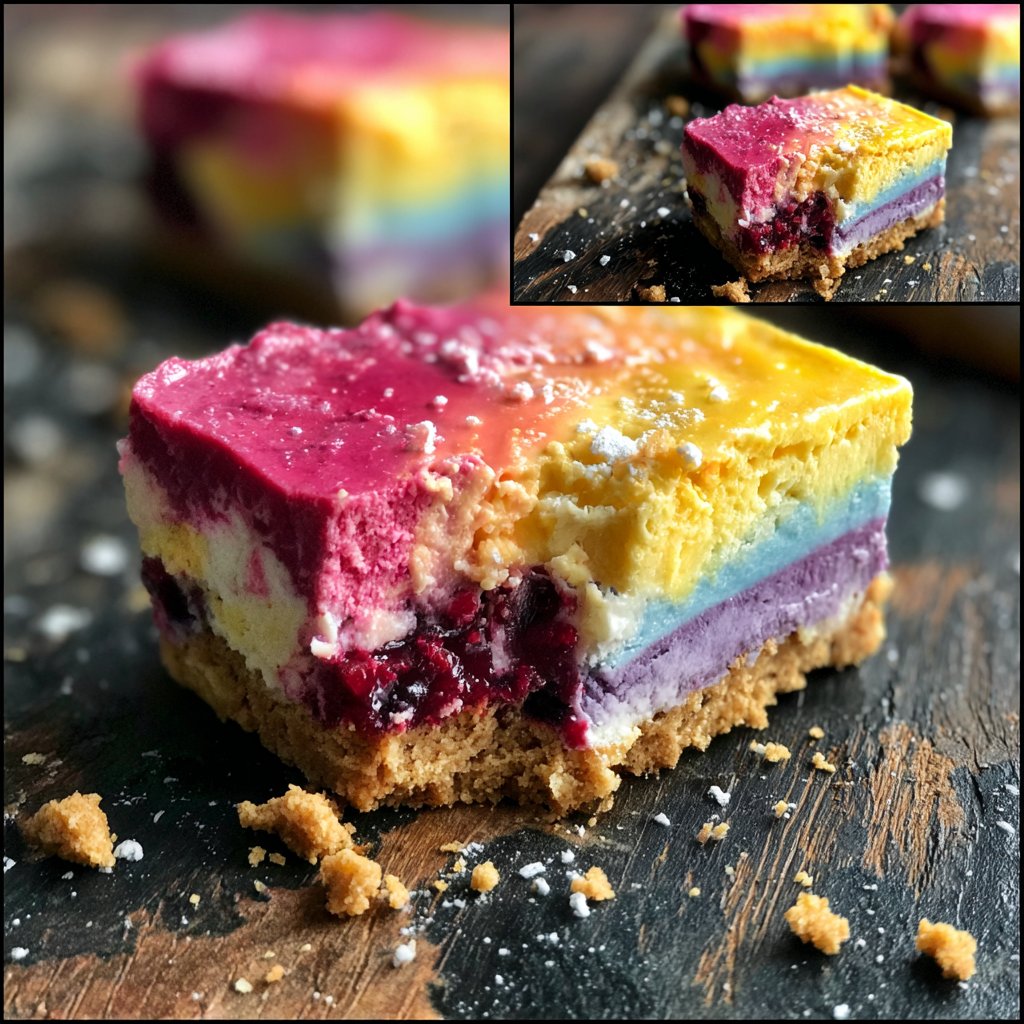
I absolutely love making No-Bake Rainbow Cheesecake Bars during warm days when I want a sweet treat without turning on the oven. The vibrant colors and cheesy creaminess never fail to impress my family and friends. Each layer is infused with a hint of fruit flavor, making it as delightful to eat as it is to look at. Plus, without any baking required, it's a straightforward process that leaves room for creativity and fun in the kitchen!
When I first experimented with No-Bake Rainbow Cheesecake Bars, I was looking for a refreshing dessert that could be made easily and quickly. The process involves creating separate layers of cream cheese mixtures colored with natural fruit juices, which not only adds beauty but also depth of flavor. I learned that letting each layer set partially before adding the next one helps achieve those stunning stripes.
Over the years, I've refined my method and prefer using a combination of gelatin and whipped cream for that perfect balance of firmness and lightness. Remember to give it enough chilling time before serving; patience is key for that incredible slice!
Why You'll Love This Recipe
- Spectacular visual appeal with vibrant colors
- Rich cream cheese flavor balanced with fruity zest
- No oven needed — perfect for hot summer days
Understanding the Ingredients
The base of the No-Bake Rainbow Cheesecake Bars lies in the graham cracker crust. The crumbs should be fine enough to create a firm base when mixed with melted butter and sugar. If you find your crust crumbling, you might be using too many crumbs or too few butter. A great way to ensure the right consistency is to press the mixture down firmly into the pan until it feels compact and solid.
The cheesecake filling is where the magic happens. Using softened cream cheese is essential; it blends smoothly with the powdered sugar without lumps. Whipping the heavy cream to stiff peaks introduces air into the filling, giving it that delightful creamy texture. If you're in a pinch for cream cheese, full-fat Greek yogurt can provide a lighter alternative, but the flavor will differ slightly.
Coloring Techniques
When it comes to coloring the cheesecake filling, using natural fruit juices is both a healthy and visually striking choice. However, the intensity of the colors depends on the juice's concentration. For brighter hues, consider reducing the juice over low heat until it's more concentrated before adding it to the cheesecake mixture. For instance, a tablespoon of strawberry puree can give a vibrant pink but may need adjusting based on your desired shade.
It's also important to mix the fruit juices into the filling gently to maintain the light texture you've whipped into it. A rubber spatula works well for this, allowing you to fold the color in without deflating the whipped cream. Be cautious with darker juices like blueberry, as they can overpower the other flavors if used too liberally.
Layering and Serving Suggestions
Layering your cheesecake filling is not just about aesthetics; it also creates a unique tasting experience with each slice. Be sure to chill each layer for at least 30 minutes until it's set enough to hold its shape when you spread the next layer on top. A spatula or offset knife helps to create smooth, even layers without disturbing the ones beneath. This process might seem tedious, but it's essential for structure and presentation.
For serving, consider garnishing with fresh fruits or a drizzle of fruit sauce for added flavor and an extra pop of color. Slicing these bars with a sharp knife dipped in warm water helps achieve clean cuts without squishing the layers. After slicing, store any leftovers in an airtight container in the fridge for up to five days, making it a fantastic make-ahead dessert.
Ingredients
Gather the following ingredients to start making your rainbow cheesecake bars!
Crust
- 1 ½ cups graham cracker crumbs
- ½ cup unsalted butter, melted
- ¼ cup sugar
Cheesecake Filling
- 16 oz cream cheese, softened
- ½ cup powdered sugar
- 1 cup heavy cream
- 2 teaspoons vanilla extract
- 1 tablespoon gelatin dissolved in ½ cup warm water
- Natural fruit juices for coloring (strawberry, blueberry, etc.)
Ensure everything is at room temperature for the best results!
Instructions
Follow these steps to create your rainbow cheesecake bars.
Prepare the crust
In a bowl, combine graham cracker crumbs, melted butter, and sugar. Press the mixture firmly into the bottom of a lined 9x9 inch pan. Refrigerate for 15 minutes.
Make the filling
In a mixing bowl, beat the softened cream cheese and powdered sugar until smooth. In another bowl, whip the heavy cream until stiff peaks form, then fold into the cream cheese mixture.
Divide and color
Divide the cheesecake mixture into four bowls. Add different fruit juices to create vibrant colors in each bowl.
Layer the colors
Spread the first colored layer over the crust and refrigerate for about 30 minutes. Repeat the process with the subsequent colors, chilling between layers.
Chill and serve
Once all layers are assembled, let the cheesecake chill in the refrigerator for at least 3 hours before slicing. Serve chilled.
Enjoy your colorful dessert with family and friends!
Pro Tips
- For the best results, use fresh fruit juices for coloring. If you're short on time, store-bought fruit purée can work too!
Troubleshooting Common Issues
If your cheesecake filling seems too runny, this may be due to under-whipping the heavy cream or not allowing the gelatin to activate properly. Make sure you whip the cream to stiff peaks and that the gelatin is completely dissolved before adding it to the mixture. If it still appears loose, refrigerate the layer longer before adding subsequent layers.
Occasionally, the graham cracker crust might be too hard to cut through after chilling. This can happen if too much butter is added or if it's compressed too tightly. If you find yourself in this situation, thaw it slightly at room temperature for a few minutes to soften before slicing.
Storage and Make-Ahead Tips
These No-Bake Rainbow Cheesecake Bars can easily be made a day in advance, making them a great choice for gatherings. Once fully chilled, cover the bars with plastic wrap to prevent drying or absorbing other odors from the fridge. They'll stay fresh for up to five days; after that, while still safe to eat, the textures may start to deteriorate as the crust softens.
If you want to freeze these bars, slice them first and layer parchment paper between the pieces to prevent sticking. Place them in a freezer-safe container. They can last up to three months in the freezer, but make sure to thaw them in the refrigerator for several hours before serving to preserve their texture and flavors.
Creative Variations
Feel free to switch up the fruit juices for a unique twist. For example, using matcha powder for a green layer or cocoa powder for a chocolate layer can introduce exciting new flavors while still maintaining that visual appeal. You can also experiment with flavored extracts, such as almond or lemon, to enrich the filling further.
For a nutty touch, consider adding finely chopped nuts or a nut-based crust if you're looking for a gluten-free variation. Almonds or pecans can lend great texture and flavor contrast to the creamy layers. Just remember to adjust the sweetness of the filling to balance out the added flavors.
Questions About Recipes
→ Can I make these cheesecake bars ahead of time?
Absolutely! These bars can be made a day in advance and stored in the refrigerator.
→ How long do these last in the fridge?
They can last up to 5 days if stored properly in an airtight container.
→ Can I substitute the cream cheese?
Yes, you can use a dairy-free cream cheese for a vegan version.
→ How do I get the layers to look more vibrant?
Use fresh juices or puree made from ripe fruits rather than packaged juices to achieve brighter colors.
No-Bake Rainbow Cheesecake Bars
Created by: The Jamescookbook Team
Recipe Type: Comfort Kitchen
Skill Level: Intermediate
Final Quantity: 12 bars
What You'll Need
Crust
- 1 ½ cups graham cracker crumbs
- ½ cup unsalted butter, melted
- ¼ cup sugar
Cheesecake Filling
- 16 oz cream cheese, softened
- ½ cup powdered sugar
- 1 cup heavy cream
- 2 teaspoons vanilla extract
- 1 tablespoon gelatin dissolved in ½ cup warm water
- Natural fruit juices for coloring (strawberry, blueberry, etc.)
How-To Steps
In a bowl, combine graham cracker crumbs, melted butter, and sugar. Press the mixture firmly into the bottom of a lined 9x9 inch pan. Refrigerate for 15 minutes.
In a mixing bowl, beat the softened cream cheese and powdered sugar until smooth. In another bowl, whip the heavy cream until stiff peaks form, then fold into the cream cheese mixture.
Divide the cheesecake mixture into four bowls. Add different fruit juices to create vibrant colors in each bowl.
Spread the first colored layer over the crust and refrigerate for about 30 minutes. Repeat the process with the subsequent colors, chilling between layers.
Once all layers are assembled, let the cheesecake chill in the refrigerator for at least 3 hours before slicing. Serve chilled.
Extra Tips
- For the best results, use fresh fruit juices for coloring. If you're short on time, store-bought fruit purée can work too!
Nutritional Breakdown (Per Serving)
- Calories: 240 kcal
- Total Fat: 16g
- Saturated Fat: 10g
- Cholesterol: 55mg
- Sodium: 150mg
- Total Carbohydrates: 20g
- Dietary Fiber: 1g
- Sugars: 14g
- Protein: 3g